How to Clean Your Sink Faucet Head Filter

A shiny faucet can make your entire kitchen or bathroom look cleaner and more inviting. But over time, mineral deposits and grime can build up, leading to a dull and less efficient faucet.
Don’t worry, though! With just a few simple steps, you can have your faucet head gleaming like new again.
Before we dive into the cleaning process, it’s important to remember that faucet styles and finishes can vary.
Safety Tip: “To ensure proper care and avoid damaging your faucet, we recommend consulting your manufacturer’s instructions for any specific cleaning recommendations. Many manufacturers offer user manuals online or have customer service lines to answer questions. However, the general steps outlined here will be effective for most common faucet types,” says Sarah McKinney a certified Cleaning Technician.
Even with regular cleaning, your faucet head might encounter some minor issues. Here are some common problems and some DIY solutions you can try before calling a plumber:
Troubleshooting Tips for Faulty Sink Faucet
- Low Water Pressure
This could be caused by a mineral buildup within the faucet aerator (the screen at the tip of the spout). Simply unscrew the aerator (consult your manual if needed) and soak it in a vinegar solution for 30 minutes. Rinse thoroughly and reattach. If the problem persists, there might be a clog deeper within the faucet, and it’s best to consult a plumber.

- Malfunctioning Spray Function
If your spray isn’t working properly, it could be due to clogged spray holes. Detach the spray head if possible (refer to your manual) and soak it in a vinegar solution for 30 minutes. Use a soft-bristled toothbrush or toothpick to gently clean the tiny spray holes. Reattach the head and test the spray.

- Dripping Faucet
A leaky faucet not only wastes water but can also be quite annoying. A worn-out washer inside the faucet is a common culprit.
While faucet repairs can get more complex, for simple drips, tightening the packing nut (the nut around the base of the handle) with an adjustable wrench might solve the problem.
However, if the leak persists or you’re uncomfortable attempting repairs, it’s best to call a professional plumber.
Remember, these are just basic troubleshooting tips for a faulty sink faucet. If you encounter more complex issues beyond these, calling a qualified plumber is the best course of action.
Safety Precaution
Before diving into the cleaning process, remember safety precautions are important. Here’s a quick tip to avoid any unexpected issues or mishap:
Turn off the water supply
Locate the shut-off valves under your sink and turn them off completely. This prevents any water flow while you are cleaning and eliminates the risk of accidental flooding.

Let’s now dive into the step-by-step process on how to clean your sink faucet head at home.
Step 1: Gather Your Cleaning Supplies
Before you begin, make sure to gather all your cleaning supplies. Here is what you will need:
- White vinegar
- Baking soda
- Toothbrush or scrub brush
- Clean cloth or sponge
- Small plastic bag
- Wrench (if your faucet head is removable)

Step 2: Prepare your Cleaning Solution
Mix equal parts of white vinegar and water in a small bowl or container. This solution will help dissolve mineral deposits and remove grime from your faucet head.
Step 3: Remove the Faucet Head (if applicable)
If your faucet head is removable, carefully unscrew it using a wrench. Place it in a small plastic bag filled with the vinegar solution. Seal the bag and let the faucet head soak for about 30 minutes to an hour.
Expert Tip: For a clogged spray function, detach the head (check your manual!) and soak it in a vinegar solution (equal parts water and vinegar) for 30 minutes. This loosens mineral buildup, making it easier to clear the tiny spray holes with a soft-bristled toothbrush or toothpick.
Step 4: Clean the Faucet Head
While the faucet head is soaking, sprinkle baking soda directly onto the faucet’s surface. Then, use an old toothbrush or scrub brush to gently scrub away any stubborn stains or buildup. Pay special attention to the aerator and any crevices where grime may be hiding.
Step 5: Rinse and Dry
After soaking, remove the faucet head from the vinegar solution and rinse it thoroughly with water. Use a clean cloth or sponge to wipe away any remaining residue. If necessary, repeat the cleaning process until the faucet head is sparkling clean.
Expert tip: After cleaning, buff your faucet head with a microfiber cloth dabbed in a touch of olive oil. This adds a protective layer and enhances the shine, leaving your faucet looking brand new!
Step 6: Reassemble and Test
Once the faucet head is clean and dry, reattach it to the faucet using the wrench if needed.
Turn on the water and let it run for a few moments to flush out any remaining vinegar or baking soda residue.
Test the faucet to ensure that it’s working properly and that water is flowing freely.
Step 7: Maintenance Tips
To keep your faucet head looking its best, incorporate regular cleaning into your household routine.
Wipe down the faucet with a damp cloth after each use to prevent mineral buildup.
You can also schedule a deep clean using the vinegar and baking soda method every few months.
With these simple steps, you can say goodbye to a dull and grimy faucet head and hello to sparkling clean water every time you turn on the tap. Happy cleaning!
Reminder: Always check your faucet manufacturer’s instructions for specific cleaning recommendations, especially for delicate finishes. For general cleaning practices and safety tips, refer to resources from reputable organizations like the International Association of Certified Cleaning Professionals (IACC).
Green Cleaning Alternatives
If you are eco-conscious like me, then you might be asking yourself what are some of the green or natural alternatives for light faucet cleaning at home!
Mixing equal parts lemon or lime juice and water can be a gentle and effective way to tackle minor grime and mineral deposits.
Simply dip a clean kitchen cloth in the solution and wipe down the faucet head.
You can also make Baking soda your friend! Making a paste using baking soda and water can and using it as a cleaning paste can help tackle stubborn spots in your sink faucet head. Remember, these natural methods may not be as powerful as vinegar for deep cleaning, but they’re a great option for regular maintenance and gentle cleaning.
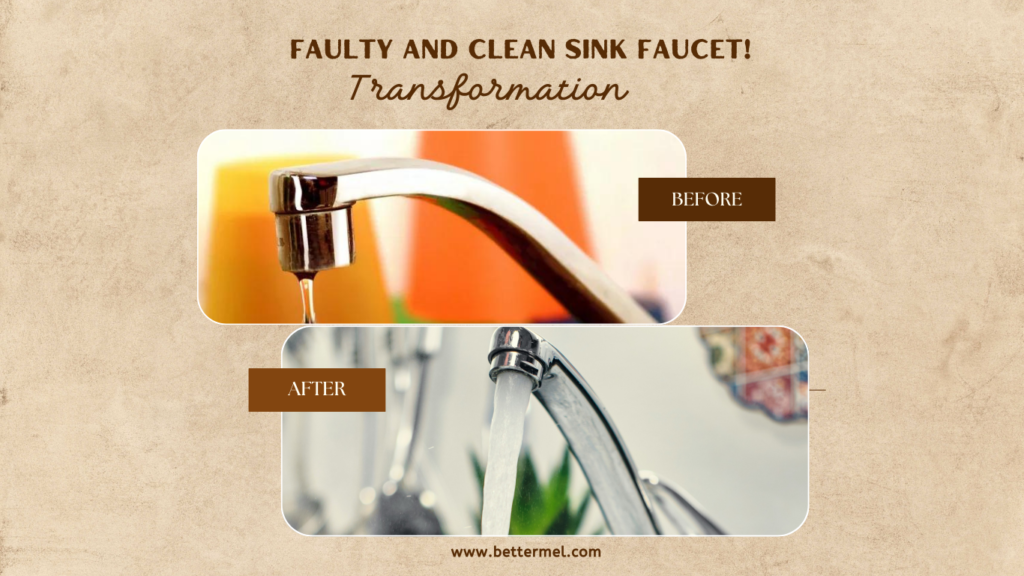
Sink Faucet Transformation Before & After Photos: Faulty and Clean Sink Faucet!
Sometimes, seeing is believing! Here’s a visual demonstration of how effective these cleaning methods can be:

Meet the expert
Sarah McKinn: A certified Cleaning Technician with over 15 years of experience in residential and commercial cleaning. Sarah is passionate about educating homeowners on effective and eco-friendly cleaning practices. She runs a popular blog called “Sparkling Spaces” where she shares cleaning tips and tutorials. Also check out our recent post here
FAQs
How often should I clean my sink faucet head?
It’s recommended to clean your sink faucet head every few months to prevent mineral buildup and maintain optimal water flow. However, if you notice reduced water pressure or visible debris, it’s a sign that cleaning is needed sooner.
Can I use any cleaning solution to clean my faucet head?
Yes, you can use a variety of cleaning solutions to clean your faucet head. One popular and effective option is a mixture of equal parts white vinegar and water. Baking soda can also be used as a gentle abrasive to remove stubborn stains and buildup.
Do I need to remove the faucet head to clean it?
While it’s not always necessary to remove the faucet head to clean it, doing so can provide a more thorough cleaning. If your faucet head is removable, you can soak it in a vinegar solution to dissolve mineral deposits and grime. If it’s not removable, you can still clean it in place using a brush and cleaning solution.
How can I prevent mineral buildup on my faucet head?
To prevent mineral buildup on your faucet head, consider installing a water softener or using a water filter to reduce the mineral content in your water. Additionally, wiping down the faucet after each use and incorporating regular cleaning into your household routine can help prevent buildup and keep your faucet looking its best.
References
International Association of Certified Cleaning Professionals (IACC):https://www.issa.com/emea-portal/emea-education/certified-cleaning-professional-technician
National Kitchen & Bath Association (NKBA):https://nkba.org/
Manufacturer’s Instructions


Comments 1